If your parents don’t have at least one photo of mini-you wearing a face full of horrendous make-up, then you didn’t have a childhood. Playing with your mum’s make-up consisted of smashing blue eyeshadow onto your lids, smearing on the brightest lipstick you could find and, most importantly, pounding a blush directly into your cheeks. Hello Miss Australia.
We’ve all gotten slightly better at doing our make-up properly since then, but where to apply blush still trips us up a bit. Does a powder blush go right on the apples of your cheeks? Are you supposed to use a little cream blush, or a lot? Can you just pick any old shade, or is there a method to choosing the perfect blush for you? We’re going to answer all these ‘how to put on blush’ questions and more so that you can nail your next look.
What is blush used for?
The use of blush can be traced back as far as Ancient Egypt. Ancient Egyptians were the O.G beauty gurus, among the first people to use natural pigments to create make-up. Both men and women would mix fat with ground red ochre to create a red substance which would be applied to the lips and cheeks (it’s crazy to think that some people have a problem with a man in a full-face of glam, when they’ve been wearing make-up since 3100BC!) The blusher-look took off in Ancient Greece as well, with both genders using crushed mulberries, red beet juice, crushed strawberries, or red amaranth to create a paste. Using cosmetics like blush was a sign of status because it was a costly process. To an extent, that also hasn’t changed much. Think about it – if you can afford to get Jeffree Star’s latest palette shipped out from America, that’s a serious flex!
Blush is still used to give the appearance of naturally flushed cheeks. Before contouring was a mainstream thing, blush was used to give your face more shape. Now, we use blush to give us that healthy glow, to stop us from looking washed out, and sometimes to make a bold statement.
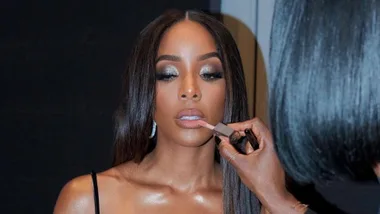
Pictured: Models for Jamie Wei Huang rock bold blush applied by Julia Edwards on the runaway
How To Pick A Blush Colour
When you’re not trying to make your blush the star of the show and are aiming for a more standard, conservative look instead, you’ll want to pick the best blush for your skin tone. It’s not just all the same pink pigment crammed into a little pan! You’ll want to get your hands on a blush that works with you, not against you!
*All of the stunning examples below are the work of @juliaedwardsmakeup.*
Fair Skin Tones
Fair skin and pale baby pink blush work together well. It’s a natural look that keeps things subtle. If you’re a fair person, lots of shades can tend to show up quite orangey on you, so a cute pink is a safe bet. A peach blush is also your friend, especially if your skin has yellow undertones (because it will enhance your natural flush). When you do want to make a statement, try reaching for a shade of plum. Go for something that’s about two shades darker than your lips as a guide, and consider getting a plum blush in a cream or stain format so you can dab and blend it into the hollows of your cheeks with ease.
Medium Skin Tones
Peach blush looks great on those with medium type skin tones, as do berry blushes. Light raspberry blushes look bright soon medium skin without being too overwhelming.
Olive Skin
Olive skin is characterised by its green undertones, so once again a warm peach shade will suit those with this skin tone. Rose coloured blushes are also suited to olive skin – not too bright, not too dusky, it achieves a happy middle ground and keeps you looking warm throughout winter. A bronzer and blush combination, or a bronzed blusher is a killer look for olive skin, it elevates the tanned look of both medium and deep olive tones .
Dark Skin
Deep raisin, terracotta and fire engine orange shades compliment dark skin. Unlike weaker pinks, these bold pigmented colours will show up on dark skin without making you look ashy. Make a ‘fish-face’ and blend a cream formula below your cheekbones for maximum impact.
Pictured: Benefit’s iconic Dandelion blusher.
The Right Tools For Blush Application
Where to apply your blush depends on your face shape.
Heart-shape faces: characterised by a wide forehead and high cheekbones, with a face tapers to a narrow chin. Heart shape faces can appear pointy, so the trick is to apply your blush in a way that softens your face. Starting by your ear, apply blush to the outer corner of your cheekbone and end at a point below the outer corner of your eye. Add the slightest touch of colour near your temples to balance the width of your forehead with your chin.
Round faces: are characterised by being as wide as they are long. Stay away from highly reflective blushes because they’ll only make your face look rounder. Matte blush is going to be your best friend. Starting by your ear, sweep the blush down your cheekbone towards your mouth. Adding the smallest touch of blush to your chin will help make your face appear longer.
Square faces: are characterised by a forehead that is roughly the same width as the cheekbones and chin. your cheekbones are the same width as your chin, so to help define them apply your blush slightly below the cheekbone. Blush in the hairline will help soften the edges of your face.
Oval faces: characterised by prominent cheekbones and a forehead that is slightly wider than the chin. To apply your blush correctly, place the product just above the bone rather than towards the hollow beneath it to help raise the height of your cheekbone.
Blush Tools For Beginners (According to Formula)
The tool you use to apply blush is going to depend on the formula of blush you’re using.
Powder blush: you’ll want to use a fluffy brush that picks up lots of pigment.
Cream blush: use your thumbs or middle fingers to work a small amount of formula into your cheeks.
Mousse blush: same as above – use your fingers or thumbs!
Gel blush: use a synthetic bristle blush brush, it won’t absorb the gel formula the way hair bristles will.
Stain blush: use your fingers but be sure to work quickly.
Pictured: How much blush is too much? Trick question, you can never have too much!
How To Apply Blush Step by Step
Want to know how to apply blush on the cheeks like a pro? Follow our guide and you’ll blushing for all the right reasons in no time.
1. Prime your skin
Lay down a moisturising base or primer before you even think of reaching for that blush pan. You want a smooth, hydrated canvas to work on, so use a sheet mask, a serum, anything that leaves your skin feeling supple.
2. Grab Your Perfect Blush (or Blushes!)
Once you’ve worked out what blush is the right shade for you, it’s time to work out what you plan to do with it. A stain blush stick or a cream blush is going to give you that second-skin, Meghan Markle’s wedding day look. If you want a bright pop of colour that’s going to go the distance, reach for a powder. You can even combine a few different shades for added dimension, using the darker of two shades on your inner cheeks and the lighter option as you blend it further out.
3. Let’s Get It On!
There are a few different techniques you can employ when applying the blush to your face.
- If you’re using a powder blush, start at the highest point of your cheek and coat your brush. Follow underneath your cheekbone, and blend towards your hairline using circular motions. To get the proportions right, measure two finger-widths from the corner of your mouth. Your blush should ideally come in no closer than that.
- Coat both sides of your brush and do a few ‘x marks the spot’ motions on the apple of your cheeks. Then blend it out for a seamless look. You can find the apples of your cheeks by grinning hard.
- For a more striking look, coat your brush and wrap the colour from your cheeks up and around your eyes. This draws attention to your eyes and makes the blush the focal point of your make-up look.
Video: Not only does this NARS How To Use Blush tutorial show a range of application techniques, it demonstrates which blushes best compliments differently skin tones.
Don’t forget to combine your blush and highlighter for an extra dewy, sparkly finish. You’ll be looking flawless in no time!
 Pexels
